Are you tired of spending money on expensive salon manicures? Look no further! This article will guide you through the process of using a nail kit to achieve professional-looking manicures in the comfort of your own home.
Say goodbye to chipped nails and hello to flawless fingertips with these easy-to-follow steps. Whether you’re a beginner or a seasoned nail enthusiast, this article has got you covered. So grab your nail kit and get ready for a salon-worthy manicure experience at home!
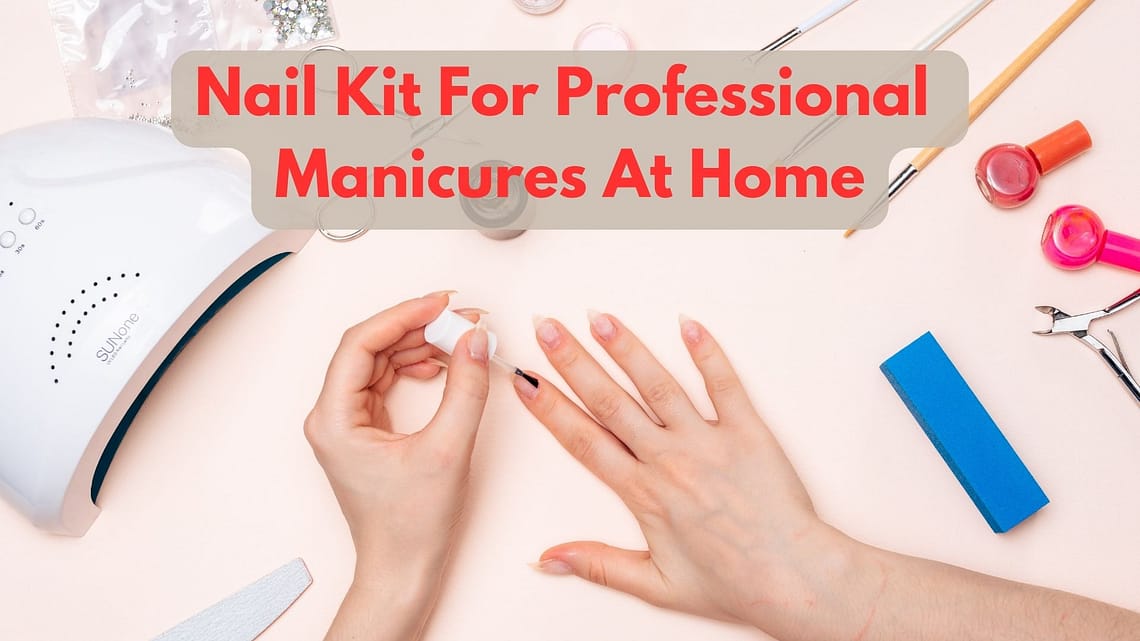
Choosing the Right Nail Set
When it comes to achieving a professional-looking manicure at home, one of the first things you need to consider is choosing the right nail kit. This will ensure that you have all the necessary tools and products to create a salon-quality result.
Consider Your Skill Level
Before you dive into buying a nail kit, take a moment to consider your skill level. Are you a beginner or an experienced nail enthusiast? This will help determine the type of nail kit that will work best for you. If you’re just starting out, it might be beneficial to opt for a beginner-friendly kit that includes all the essentials such as nail clippers, a nail file, a base coat, and a top coat. On the other hand, if you’re more experienced and looking to elevate your nail game, you might want to invest in a kit that offers a wider range of nail art supplies and tools.
Research Different Brands
Once you have a clear idea of your skill level, it’s time to start researching different nail kit brands. Look for brands that are known for their high-quality products and positive customer reviews. Take your time to read through different websites, blogs, and forums to gain insight into each brand’s reputation. It’s also helpful to consider the specific features and products included in each kit. Some brands might offer additional accessories or specialty nail polishes that cater to certain preferences or nail art techniques.
Read Customer Reviews
Customer reviews can be incredibly valuable when it comes to narrowing down your options and finding a nail kit that lives up to its promises. Pay attention to reviews from customers who have a similar skill level and nail type as you. Look for comments on the quality and durability of the tools, the effectiveness of the base and top coats, and the overall satisfaction of the customers. Remember, customer reviews can provide valuable insights and give you a realistic expectation of what to expect from a particular nail kit.
Preparing Your Nails
Preparing your nails is an essential step that sets the foundation for a successful manicure. By properly preparing your nails, you can ensure that your polish applies evenly and lasts longer.
Remove Any Old Nail Polish
The first step in preparing your nails is to remove any old nail polish that may be lingering. Acetone-free nail polish removers are generally the most gentle option for your nails. Soak a cotton ball or pad with the remover and gently rub it over each nail until all traces of polish are gone. Take care to remove any polish from the nooks and crannies around your cuticles. Once your nails are completely clean, give them a quick rinse with water to remove any residue.
File and Shape Your Nails
Once your nails are clean, it’s time to shape and file them to your desired length and shape. Use a high-quality nail file to gently file your nails in one direction, from the sides towards the center. Avoid using a back-and-forth sawing motion, as this can cause your nails to weaken and potentially break. If you’re unsure about which nail shape suits you best, a classic oval shape is a safe and versatile option.
Soak Your Nails
To further prepare your nails, you can soak them in warm water for a few minutes. This will help soften your cuticles and make them easier to work with. You can add a few drops of gentle soap or essential oils to the water for a relaxing experience. After soaking, pat your nails dry with a clean towel and you’re ready to move on to the next step.
Properly Applying Base Coat
The base coat is an essential step in achieving a professional-looking manicure. It not only helps protect your nails from staining but also provides a smooth surface for the polish to adhere to.
Clean Your Nails
Before applying the base coat, it’s important to make sure your nails are clean and free from any oils, lotions, or residue. You can use a cotton pad soaked in a gentle nail cleanser or rubbing alcohol to wipe each nail’s surface. This will ensure that the base coat adheres well to your nails and prolongs the life of your manicure.
Apply a Thin Layer of Base Coat
Once your nails are clean, it’s time to apply the base coat. Start by applying a thin layer of base coat to each nail, starting from the cuticle and moving towards the tip. The key here is to avoid applying too much product, as this can result in a thicker and less even coat. Instead, use light and even strokes to apply a thin layer that covers the entire nail surface. Allow the base coat to dry completely before moving on to the next step.
Allow Base Coat to Dry
The drying time for the base coat can vary depending on the brand and specific formulation. Be sure to read the instructions on the bottle and give your nails enough time to dry completely. This will prevent any smudging or potential damage to the base coat when you apply the colored polish.
Also Check: What Are The Advantages Of Using Nail Sets For Nail Care?
Mastering the Art of Polishing
Now that the base coat is dry, it’s time to move on to the fun part – applying the colored polish. The key to achieving a professional-looking manicure is to take your time and apply each coat with precision.
Choose Your Nail Polish Color
When selecting a nail polish color, consider your personal style, the occasion, and the current trends. Whether you prefer bold and vibrant hues or soft and neutral shades, there’s a color out there for everyone. Don’t be afraid to experiment and try something new – after all, it’s just polish and can easily be removed if you’re not satisfied with the result.
Apply the First Coat
Start by applying a thin and even layer of polish to each nail. Begin from the base near the cuticle and gently brush the polish upwards towards the tip. Be sure to leave a small gap between the polish and your cuticles to prevent any smudging or lifting. If you’re using a sheer or lighter color polish, you may need to apply a second coat for more opacity. Allow the first coat to dry completely before applying the next layer.
Apply Additional Coats
For a more vibrant and opaque color, it’s usually necessary to apply additional coats of polish. Remember to always wait for each coat to dry completely before applying the next one. Applying each coat too quickly can result in streaks, smudges, or an uneven finish. Take your time and apply each subsequent coat with precision and care. Depending on the opacity and quality of the polish, two to three coats are usually sufficient to achieve the desired color intensity.

This image is property of pixabay.com.
Perfecting the Technique of Nail Art
Nail art allows you to express your personal style and creativity through intricate designs and patterns. With the right nail art supplies and techniques, you can elevate your manicure to the next level.
Select Nail Art Supplies
To get started with nail art, you’ll need a few basic supplies. Nail art brushes, dotting tools, nail studs, and nail striping tape are just a few examples of the tools you can use to create stunning nail art designs. Take the time to explore different options and see what resonates with your personal style. You can find nail art supply kits that come with a variety of tools, or you can purchase individual tools as you need them.
Practice Basic Nail Art Designs
If you’re new to nail art, it’s best to start with some basic designs and techniques. Simple polka dots, stripes, or floral patterns are great places to begin. Practice these designs on a nail wheel or on a piece of paper before attempting them on your nails. This will help you gain confidence and refine your techniques. Don’t be discouraged if your first attempts are not perfect – nail art requires practice and patience.
Experiment with Advanced Techniques
Once you feel comfortable with basic nail art designs, you can start experimenting with more advanced techniques. Water marbling, gradient effects, and freehand drawings are just a few examples of the many possibilities. YouTube tutorials, Instagram nail art accounts, and online forums are excellent resources for inspiration and step-by-step guides. Take your time to explore different techniques and have fun with your creations. Remember, nail art is all about expressing yourself and embracing your creativity.
Caring for Your Cuticles
Maintaining healthy cuticles is an important part of nail care. By keeping your cuticles nourished and well-groomed, you can enhance the overall appearance of your manicure.
Use Cuticle Oil
Cuticle oil is a must-have product for keeping your cuticles in top shape. It helps moisturize and soften the skin around your nails, making it easier to push back and remove any excess cuticles. Apply a few drops of cuticle oil to each nail and gently massage it into the cuticle area. This will help nourish and hydrate your cuticles, preventing them from becoming dry and cracked.
Gently Push Back Cuticles
After applying cuticle oil, use a cuticle pusher or an orange stick to gently push back your cuticles. This will create a clean and neat appearance, making your nails look longer and more defined. Be careful not to push too hard or cut into the cuticles, as this can lead to irritation or infection. If you prefer a more natural look, you can simply skip this step and focus on moisturizing your cuticles.
Trim Excess Cuticles
If you have any excess or overgrown cuticles, you can carefully trim them using cuticle nippers or a cuticle trimmer. Take extra care when trimming to avoid cutting into the live tissue, as this can cause bleeding and discomfort. Only trim the cuticle area that is visibly overgrown and avoid cutting too close to the nail bed. After trimming, apply a generous amount of cuticle oil to moisturize and soothe the freshly trimmed area.

This image is property of pixabay.com.
Sealing the Look with a Top Coat
Once you’ve completed your manicure, it’s important to seal the look with a top coat. The top coat not only adds shine and prolongs the wear of your polish but also protects your nail art from chipping or smudging.
Apply a Thin Layer of Top Coat
Before applying the top coat, make sure your nails are completely dry and free from dust, lint, or any other particles. Using a high-quality top coat, brush on a thin and even layer from the base of your nail to the tip. Be sure to cap the free edge of your nails by brushing the top coat along the edge. This will help seal the polish and prevent any chips or peeling.
Ensure Even Coverage
To ensure even coverage, use smooth and light strokes to apply the top coat. Try to avoid going over the same area multiple times, as this can lead to streaks or unevenness. If you’re applying the top coat over nail art, take extra care to avoid dragging or smudging the design. A steady hand and a patient approach will help you achieve a flawless and long-lasting finish.
Allow Top Coat to Dry
Just like with the base coat, it’s crucial to allow the top coat to dry completely before engaging in any activities or touching anything. The drying time can vary depending on the brand and formulation of the top coat. However, as a general rule of thumb, it’s best to wait at least 10-15 minutes before exposing your nails to any potential risks. You can also use quick-dry top coats if you’re short on time and need your manicure to dry faster.
Cleaning Up Any Mistakes
Even with the most careful application, mistakes can happen during the nail polishing process. Luckily, there are effective ways to clean up any smudges or stray polish without ruining your manicure.
Use a Cotton Swab and Nail Polish Remover
If you accidentally smudge your polish or get any excess polish on your skin, a cotton swab dipped in nail polish remover can be your best friend. Gently dab the cotton swab on the affected area, taking care not to drag or smudge the polish further. This will help remove the excess polish and clean up any mistakes.
Outline Your Nails with a Thin Brush
For more precise clean-up, you can use a thin brush dipped in nail polish remover to outline your nails. This helps create a crisp and clean line between your nails and your skin, giving your manicure a polished and professional look. Take your time and use small, precise strokes to clean up any uneven edges or stray polish.
Clean Up Excess Polish
After you’ve finished cleaning up any mistakes, take a moment to ensure that the overall appearance of your nails is neat and clean. Check for any smudges or excess polish that may have been missed during the clean-up process. Gently remove any remaining traces of excess polish with a small cotton pad or cotton swab, making sure not to touch the actual nail surface.

Maintaining Your Manicure
Now that you’ve achieved a professional-looking manicure, it’s important to maintain it to ensure its longevity and beauty. With a few simple tips, you can keep your nails looking salon-fresh for longer.
Moisturize Your Hands and Nails
Regularly moisturizing your hands and nails is crucial for maintaining their health and appearance. Invest in high-quality hand cream or cuticle oil and apply it daily to keep your skin and nails hydrated. This will prevent dryness, cracking, and peeling, allowing your manicure to stay intact for a longer period of time. Don’t forget to pay extra attention to your cuticles, as they are often prone to dryness and damage.
Avoid Chipping and Breakage
To prevent chipping and breakage, it’s important to treat your nails with care. Avoid using your nails as tools for opening packages or scratching surfaces. Instead, reach for a pair of scissors or a designated tool for these tasks. If you frequently engage in activities that are rough on your nails, such as gardening or cleaning, consider wearing gloves to protect them. By being mindful of how you use your hands, you can reduce the risk of damaging your manicure.
Consider Regular Touch-ups
Even with proper care, no manicure is completely immune to everyday wear and tear. To keep your nails looking fresh, consider doing regular touch-ups. This can involve applying an extra layer of top coat every few days to refresh the shine and protect the polish. If you notice any chips, carefully fill in the affected area with the same color polish and apply a fresh layer of top coat. Regular touch-ups will help extend the life of your manicure and maintain its professional appearance.
Conclusion
Achieving a professional-looking manicure at home is not only possible but also an enjoyable and rewarding experience. By choosing the right nail kit for your skill level, properly preparing your nails, mastering various techniques, and caring for your cuticles, you can create salon-quality results without leaving the comfort of your own home.
With practice and regular maintenance, you’ll be able to express your personal style and creativity through beautifully manicured nails. So grab your nail kit, unleash your inner nail artist, and enjoy the endless possibilities of DIY manicures!


