
Looking to add some gorgeous curls to your hair but don’t have a curling iron? No worries! In this article, we’ll show you the insider secrets how to curl hair with straightener. From the perfect technique to the best products, we’ve got you covered.
Say goodbye to dull, straight locks and hello to stunning, bouncy curls in no time. So, grab your straightener and get ready to transform your look with these styling secrets. Let’s get started!
Prepping Your Hair
Before you start curling your hair with a straightener, it’s important to properly prepare your hair for this styling process. The following steps will ensure that your hair is clean, protected, and ready to be transformed into stunning curls.
Wash and Condition Your Hair
Start by washing your hair with a high-quality shampoo and conditioner that suits your hair type. It’s recommended to use products specifically designed for curly hair, as they will provide additional moisture and enhance the curling process. Gently massage the products into your scalp and hair, thoroughly rinsing them out.
Apply Heat Protectant
Before exposing your hair to any heat styling tool, it’s crucial to protect it from potential damage. Apply a heat protectant spray or serum evenly throughout your hair, focusing on the mid-lengths and ends. This will create a protective barrier between your hair and the straightener, reducing the risk of heat damage.
Detangle Your Hair
To ensure smooth and tangle-free curls, detangle your hair using a wide-tooth comb or a brush specifically designed for detangling. Start from the ends of your hair and gently work your way up, gradually removing any knots or tangles. This step will make the curling process easier and prevent any unnecessary pulling or breakage.
Sectioning Your Hair
To achieve salon-worthy curls, it’s essential to section your hair properly. This technique allows you to focus on one area at a time, ensuring that every curl is uniform and well-defined.
Separate Your Hair into Sections
Using your fingers or a comb, divide your hair into multiple sections. The number of sections will depend on the thickness of your hair and the size of curls you desire. For larger, loose waves, divide your hair into fewer sections. For smaller, tighter curls, create more sections. Secure each section with a hair clip or hairband to keep them separate.
Clip Up the Rest of Your Hair
Once you have separated the desired sections, take the remaining hair and clip it up or secure it away from the sections you will be curling. This will prevent any interference with the curls you are working on and make the process more manageable. It’s important to keep the rest of your hair out of the way to maintain a clean and organized curling process.
Choosing the Right Straightener
Selecting the right straightener is crucial for achieving the best results when curling your hair. Consider the following factors when choosing the perfect straightener for your curling needs.
Select a Straightener with Rounded Edges
When using a straightener to curl your hair, it’s important to choose one with rounded edges. Flat-edged straighteners can leave creases or lines in your curls, whereas rounded edges provide a smooth and seamless curling experience. The rounded edges allow you to glide the straightener smoothly through your hair, creating beautiful curls without any unwanted marks.
Also Check: How To Use A Water Flosser For Dental Health
Opt for a Straightener with Adjustable Temperature
To cater to different hair types and textures, it’s advisable to invest in a straightener with an adjustable temperature setting. Fine and delicate hair requires lower heat to avoid damage, while thick and coarse hair may need higher heat to create defined curls. Having the flexibility to adjust the temperature ensures that you can customize the heat level to suit your specific hair needs.
Setting the Right Temperature
Choosing the appropriate temperature for curling your hair is essential to prevent heat damage and achieve long-lasting curls. Consider these factors before setting the temperature on your straightener.
Consider Your Hair Type and Texture
Different hair types and textures require different levels of heat to achieve optimal results. Fine hair tends to be more delicate and should be curled at a lower temperature to avoid damage. Thicker hair can withstand higher heat levels, allowing for more defined and long-lasting curls. Consider your hair type and texture when determining the temperature that will work best for you.
Source: TheTechBrain AI
Adjust the Temperature Accordingly
Once you have determined your hair type and texture, set the straightener to the appropriate temperature. Start with a lower temperature if you have fine or thin hair, gradually increasing it if necessary. For thicker or coarser hair, begin with a higher temperature and adjust accordingly. It’s always better to start with a lower temperature and gradually increase, rather than risking damage by starting too high.
Techniques for Curling
Now that you’ve prepped your hair and set the right temperature, it’s time to dive into the different techniques for curling your hair with a straightener. These techniques will help you achieve various curls and styles, allowing you to experiment and find the perfect look for any occasion.
Basic Curling Technique
To create classic curls with a straightener, follow these steps:
- Take a small section of hair, about an inch thick.
- Clamp the straightener close to the roots of the section.
- Gently rotate the straightener away from your face, sliding it down the section slowly.
- Repeat this process with each section of hair, curling away from your face for a natural-looking result.
- Once all sections are curled, let your hair cool completely before styling or running your fingers through the curls.
Twist and Slide Method
The twist and slide method creates beautiful, loose waves. Here’s how to achieve this look:
- Take a section of hair and clamp the straightener near the roots.
- Start twisting your wrist away from your face, wrapping the hair around the straightener.
- Slowly slide the straightener down the section while maintaining the twist.
- Continue this motion throughout your hair, alternating the direction of the twist for a more natural look.
- After all sections are curled, allow your hair to cool before styling or separating the curls with your fingers.
Curling Away from the Face
To achieve voluminous curls that frame your face, try curling away from your face using these steps:
- Take a section of hair and clamp the straightener near the roots.
- Rotate the straightener away from your face, curling the hair away from your face as you slide down the section.
- Continue this technique with each section, ensuring that all curls are directed away from your face.
- Allow your hair to cool before styling or gently combing through the curls with your fingers for a softer look.
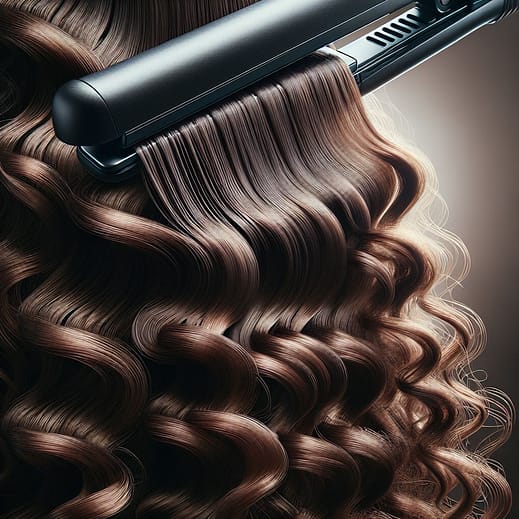
Curling Different Hair Lengths
")
This image is property of images.pexels.com.
Curling techniques can vary depending on your hair length. Whether you have short, medium, or long hair, here are some tips for achieving stunning curls with a straightener.
Curling Short Hair
Short hair can be easily curled with a straightener, creating a playful and textured look. Follow these steps:
- Divide your hair into small, manageable sections.
- Clamp the straightener near the roots of a section, making sure not to grab too much hair at once.
- Rotate the straightener away from your face, curling the hair as you slide down to the ends.
- Continue this technique with each section, working your way around your head.
- Once all sections are curled, use your fingers or a small comb to gently loosen the curls and add volume.
Curling Medium Length Hair
Medium-length hair offers versatility when it comes to curling. Try these steps for creating beautiful curls:
- Divide your hair into sections that suit the size of curls you desire.
- Clamp the straightener near the roots and slowly rotate it away from your face as you slide down the section.
- Hold the straightener on each curl for a few seconds before releasing.
- Continue curling each section, alternating the direction of the curl for a more natural look.
- Allow your hair to cool before styling or running your fingers through the curls to achieve a softer appearance.
Curling Long Hair
Long hair provides endless possibilities for curling styles. Follow these steps to achieve gorgeous curls:
- Divide your hair into sections, adjusting the size according to the desired curl style.
- Begin curling from the middle of each section rather than starting at the roots. This will add a natural-looking wave rather than a tight curl.
- Clamp the straightener near the middle of the section and slowly rotate it away from your face as you slide down towards the ends.
- Continue this technique with each section until your entire head is curled.
- After your hair has cooled, gently tousle the curls with your fingers to create a more relaxed, voluminous look.
Creating Different Curl Styles
Now that you have mastered the techniques for curling hair with a straightener, it’s time to explore different curl styles. These styles offer versatility and allow you to express your unique personality through your curls.
Loose Beach Waves
For effortless, beachy waves, follow these steps:
- Use a larger section of hair to create loose waves.
- Clamp the straightener near the middle of the section and rotate it away from your face.
- Slide the straightener down the section, but avoid curling the ends for a more relaxed look.
- Repeat this process with each section, alternating the direction of the curls for a natural appearance.
- Once all sections are curled, allow your hair to cool and gently tousle the waves with your fingers to create soft, beachy texture.
Tight Ringlets
If you prefer tighter, more defined curls, follow these steps:
- Take smaller sections of hair to achieve tight ringlets.
- Clamp the straightener near the roots and slowly rotate it away from your face as you slide down the section.
- Continue this technique throughout your hair, ensuring that all sections are curled in the same direction.
- Allow your hair to cool completely before styling or gently separating the curls with your fingers for more volume and bounce.
Bouncy Curls
To achieve bouncy, voluminous curls, try these steps:
- Use medium-sized sections of hair for more bounce.
- Clamp the straightener near the roots and rotate it away from your face while sliding down the section.
- Hold the straightener on each curl for a few seconds before releasing.
- Continue curling each section, alternating the direction of the curls for added dimension.
- After your hair has cooled, use your fingers or a wide-tooth comb to gently separate the curls and create volume.
Preventing Heat Damage
While achieving beautiful curls is exciting, it’s important to prioritize the health of your hair and minimize heat damage during the styling process. Follow these tips to protect your hair from excessive heat exposure.
Avoid Excessive Heat Exposure
Limit the amount of heat your hair is exposed to by avoiding unnecessary touch-ups or restyling. Excessive heat can cause dryness, frizz, and damage to your hair. Embrace your curls and try to extend the lifespan of your styled hair by using alternative methods to refresh and maintain your curls.
Use a Lower Heat Setting
Find the lowest heat setting that still allows you to achieve your desired curls. High heat can cause damage and strip your hair of its natural moisture. Using a lower heat setting minimizes the risk of heat damage, especially if your hair is fine or easily prone to breakage. Take the time to find the right balance between temperature and results.
Maintaining Your Curls
After you have beautifully curled your hair with a straightener, it’s essential to take steps to maintain the longevity and appearance of your curls. Follow these tips to keep your curls looking fresh and defined.
Apply a Light Hold Hairspray
To ensure that your curls stay in place throughout the day, apply a light hold hairspray. This will provide flexible hold without making your hair stiff or crunchy. Hold the hairspray about 10 to 12 inches away from your head and lightly mist it over your curls. Avoid overusing hairspray, as it can weigh down your curls and make them appear flat.
Avoid Touching Your Curls
As tempting as it may be to run your fingers through your curls or constantly touch them, try to avoid excessive touching. This can cause frizz and disrupt the shape and definition of your curls. Allow your curls to set and cool completely before styling or lightly separating them with your fingers for a more natural look.
Conclusion
Congratulations! You are now equipped with the knowledge and techniques to curl your hair with a straightener. Remember to prepare your hair properly, section it appropriately, choose the right straightener, set the correct temperature, and experiment with various techniques and styles. Embrace the versatility of your curls and enjoy the beauty and confidence that comes with having stunning, curled hair.


